Navigating the interface
BrainDeer is built around four zones. Learn where everything lives, then dig into each panel — and how Sims Mode lets you act on structures without hunting through menus.
The layout at a glance
Center Synchronized multiplanar 2D views and the live VTK 3D scene
Left View Adjustments: appearance, colormap, contrast, opacity
Right Plugin Studio: Atlas Browser, Warpdrive, ROI Studio, …
Bottom Data Organization: loaded volumes, tracts, layers, visibility
The three surrounding panels, and how they frame the views.
Center: synchronized views
Every 2D tile (sagittal, coronal, axial) and the 3D scene share one crosshair. Click a voxel in any view and the others follow. Volumes, overlays and tractography all live in the same space, so you never lose context.
Scroll or scrub: the crosshair stays locked across every view.
- Click in a 2D tile to move the crosshair everywhere
- Orbit the 3D scene; the slice planes stay put on the same voxel
- More detail: 2D ↔ 3D linking
Left: View Adjustments
Appearance, colormap, contrast, brightness, opacity and resampling for the active volume. This is where the view becomes readable.
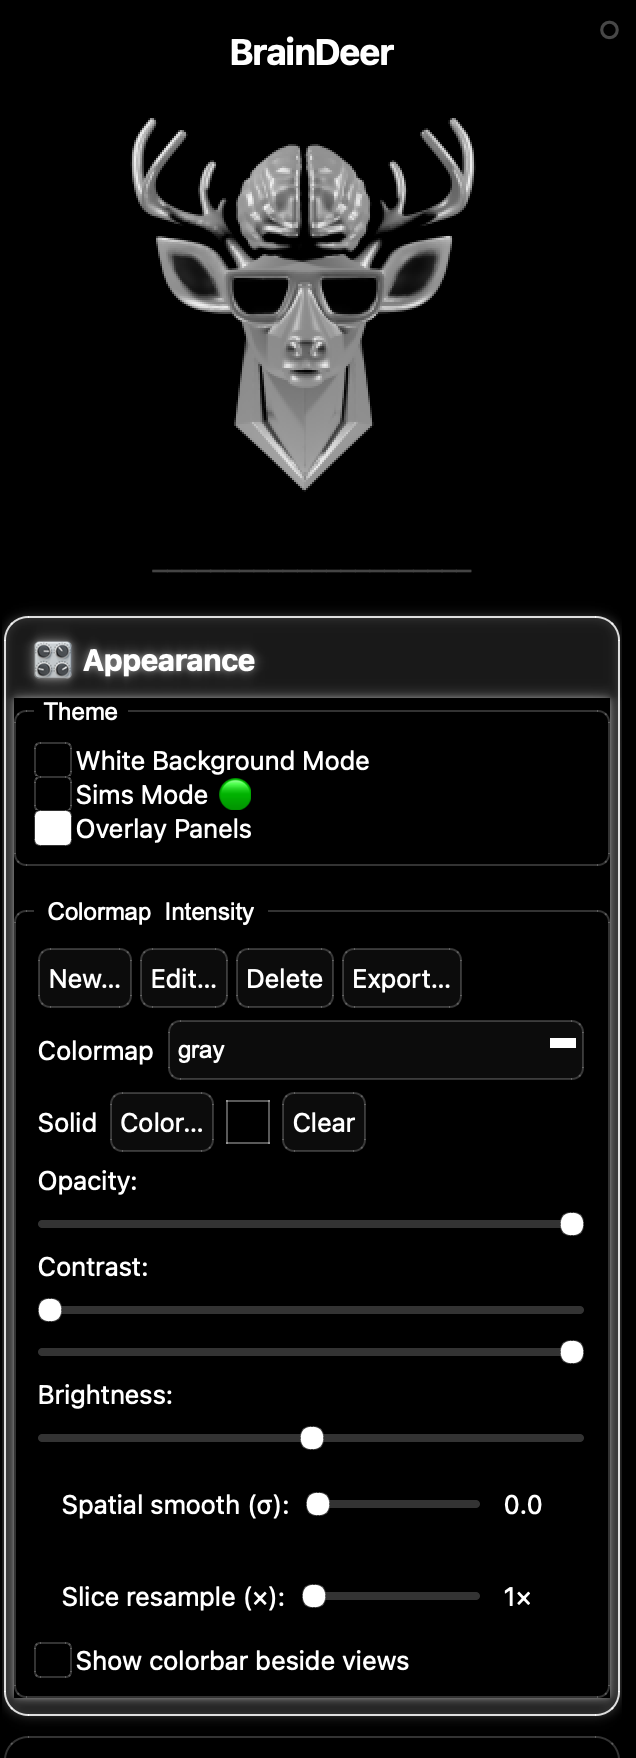
Typical moves
- Switch colormap and tweak contrast / brightness
- Dial opacity for overlays
- Toggle the colorbar beside the views
Right: Plugin Studio
Plugins dock here as tabs: Atlas Browser, Warpdrive, ROI Studio, Blender bridge, VR, AI, and anything you write yourself. The studio is how BrainDeer grows with you.

Typical moves
- Open the Atlas Browser and toggle structures
- Jump into Warpdrive to nudge a normalization
- Browse the Plugin catalog
Bottom: Data Organization
Everything you have loaded: volumes, overlays, tracts and their layer order. Show, hide, reorder and inspect from here.
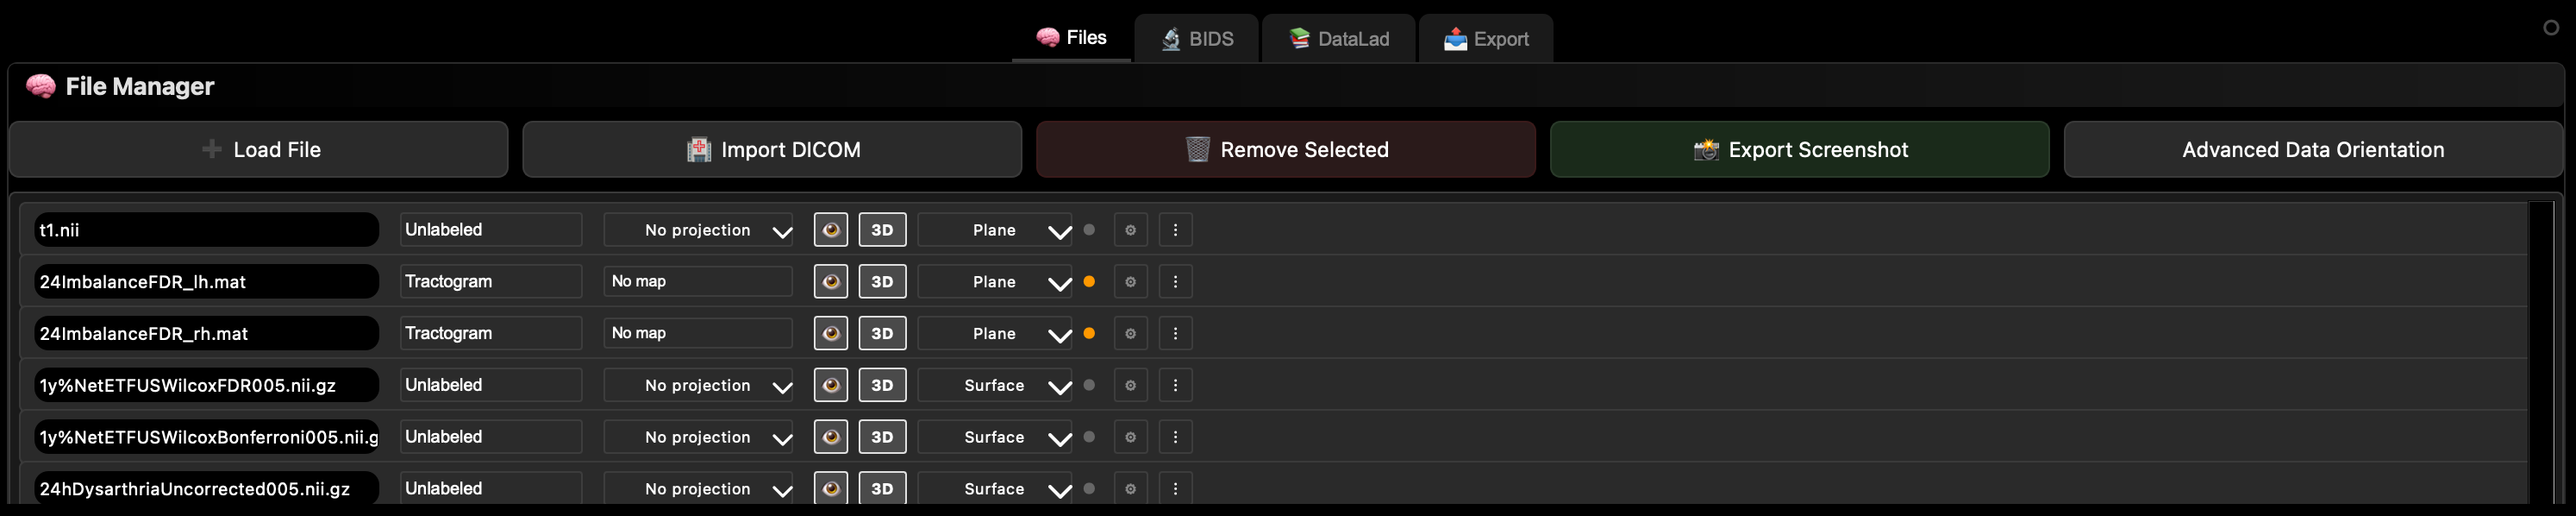
Typical moves
- Drag layers to change draw order
- Toggle visibility without unloading data
- Inspect which space a volume lives in
Sims Mode
Sims Mode turns structures into something you can point at and act on. Enable it in View Adjustments (Appearance → Sims Mode) or press Shift+S. Hover a structure for the edge glow, then short-click: a radial pie opens around the green plumbob with quick actions for that layer.
Enable Sims Mode, hover a structure, short-click — the pie appears.
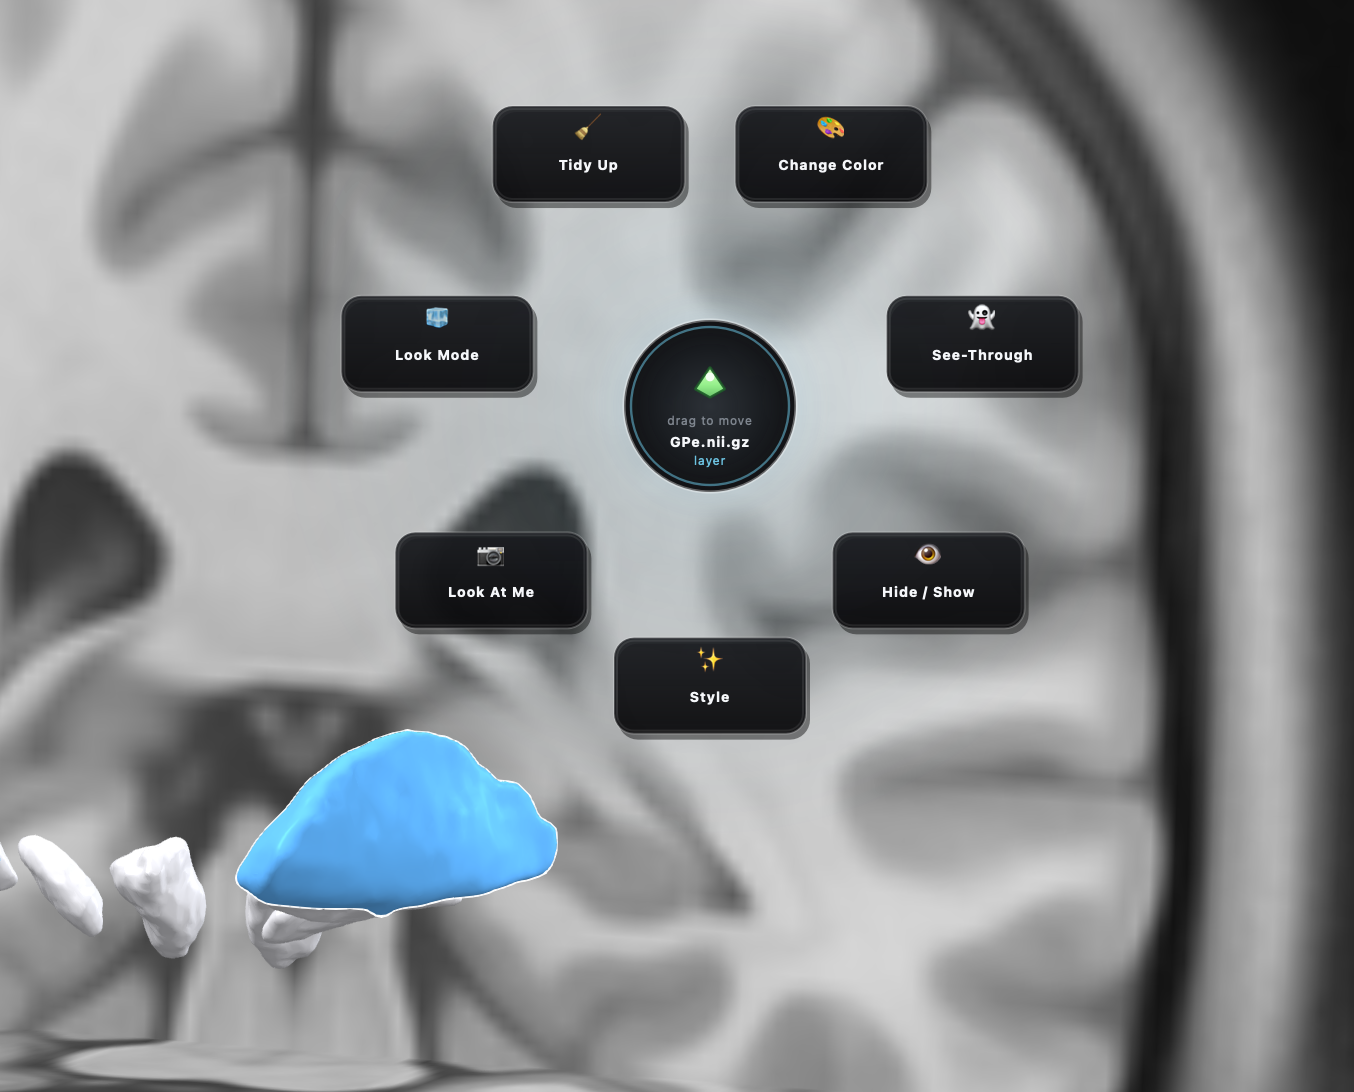
Typical moves from the pie
- Change color, see-through, hide / show
- Style the layer, or “Look At Me” to frame it
- Drag the plumbob to reposition when the action allows
Shift+Stoggles Sims Mode (same as the left-panel checkbox)- Short-click on a 2D slice or a 3D structure — long-drag keeps normal navigation
- The center of the pie names the active layer so you always know what you are editing
Full screen a view
Any tile in the 2×2 layout can go full screen. Right-click the view (including the 3D scene), choose Full Screen, and work in that pane alone. Right-click again and pick Exit Full Screen to restore the grid. The same menu also switches layouts (2x2, 1x3, 3x1).
Right-click → Full Screen → explore → Exit Full Screen.
Gestures & view controls
No media here yet — the essentials:
2D slices (sagittal / coronal / axial)
- Scroll (or trackpad swipe) to change the slice
- Click to move the shared crosshair; the other views follow
- Drag the crosshair when you want to scrub continuously
3D scene
- Left-drag to orbit
- Pan with the middle button / trackpad pan gesture (or the scene’s pan control)
- Scroll to zoom
- Right-click → Full Screen for an uncluttered orbit (see above)
With Sims Mode on
- Short-click a structure for the pie; a longer drag keeps normal navigation
Shortcuts (navigation)
A short list for moving around. The full table lives under Keyboard shortcuts once it is filled out.
| Shortcut | Action |
|---|---|
Shift+S |
Toggle Sims Mode |
| Right-click on a view | Layout / Full Screen menu |
| Click in a 2D tile | Jump the crosshair (all views sync) |
Next steps
- Quickstart · 5 min: load your first scan
- Working with atlases: structures on top of your data
- 2D ↔ 3D linking: how the sync actually works